Applying Tile Tape
To begin, be certain your tiles are clean and dry! Most of our customers peel off Tile Tape by hand and apply to the front of the tile pattern. Or you can build an apparatus similar to that in the adjacent photo. In either case give the tape a good rub to assure adequate adhesion.
Keeping the Pieces Still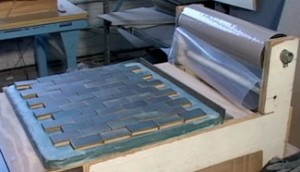
If you are using small pieces of tile and have trouble with pieces moving, try one of these methods. The simplest way is to spray adhesive on your table top or on paperboard. Otherwise, get the widest masking tape available. Make a jig with 4 pieces of 1 x 2 wood a little bigger than the length and width of your pattern. Now place the masking tape on the jig until the space is full, then simply flip it over and its ready to build a mosaic or border. Because the blue masking tape is low tack, you can place and remove your pieces easily. Now place your pieces with the backs of tiles against the blue tape adhesive, making your mosaic so you can see the pattern. Once your pattern is done, you apply our Tile Tape to the top of the tiles.
If you are to be making a number of borders or accents with the same basic pattern you can make a mold out of wood and glue tile separators on it to space your tiles, then assemble your pattern and apply our TILE TAPE. Some of our customers set up a workbench with a tape dispenser mounted horizontally on the side of where they build their pattern, like that shown in the adjacent photo.
Advantages of Tile Tape Over Other Preassembly Techniques
Kraft facing – This requires applying water-soluble glue to one side of kraft paper and, while still wet, applying it to the face of one’s pattern. Once it is dry it is then installed. The obvious problems here are: having to mix the glue; having to apply the glue; having to clean up the glue container and brushes and tables; and more importantly, the installer cannot see the pattern. I’ve heard many stories about installers discovering that they’ve put in the work upside down and the subsequent headaches of correcting this, stories differing depending upon whether the mistake is discovered while the mortar is still wet or not. With TILE TAPE the installer can see all the parts and, as long as they were assembled correctly to begin with, will not need to adjust pieces. If there is adjusting to do TILE TAPE is easily cut with any knife.
Another common problem is the accidental spilling of water on kraft facing, causing pieces of the tile to fall off before installations. TILE TAPE is not water-soluble so this is not a problem when one uses TILE TAPE.
The advantages of using Tile Tape over any Back-Mount method is the ease of use; no glue to buy, mix, apply and clean up. There is no waiting for the glue to dry before putting meshed tiles in boxes or into mortar or thinset. More importantly the tile will have 100% adhesion with the mortar or thinset when using Tile Tape as opposed to 50% to 70% contact when using mesh.
Mesh-Mount Paper, Fiberglass & Tape
4 Old Mill Road, Redding, CT 06896 USA
203-349-9372
Fax: 203-544-2200